When Fleet Branding Has to Sit on a Rear-Mounted Delivery Box
A restaurant or platform rider locks a fabric delivery box onto a scooter tail rack, loads stacked meal trays through the top, and pulls into traffic. From the curb and from the car behind, the box is a moving brand face: the lid and the rear panel catch the eye first, the sides show at intersections, and the base sits hidden against the rack. A marketing file that centers a logo on a blank rectangle does not yet know where the zipper turns, where reflective trim occupies a lid edge, or where a mounting strap and buckle cross a side panel. The commercial problem is not whether the box can carry a mark. It is whether the artwork is planned for the finished, hardware-bearing surfaces of a rear-mounted motorcycle food delivery box, rather than for a flat poster. DeliverKingdom manufactures insulated and thermal food bags, rider delivery equipment, and related commercial transport bags from a Guangzhou headquarters and a Yangchun, Guangdong plant operating since 2013, with roughly 12,000 square meters of production space and more than 400 staff. For buyers preparing custom artwork, the useful questions start with how the box is seen on the vehicle, which panels are actually printable, and how cut lines, stitch lines, and hardware should be marked before a sample is printed.
Why a Cutting Pattern Is Not a Print Template
A cutting and sewing pattern shows how the outer shell is cut from a roll and sewn into a box. Each panel is laid flat at its cut size, which includes seam allowance, zipper tape, corner boxes or darts, and any wrap that will disappear once the panel is stitched to its neighbor. Stitch lines, notches, and fold marks belong on that document because they tell the sewing line where the finished edge will fall. A print template serves a different job. It shows the finished visible face after sewing, at full scale, with the maximum print area, a safe margin inside zippers, seams, and hardware, and, when a graphic is meant to run to a sewn edge, the bleed that will be hidden in the seam. Teams that design on a sewing pattern often place artwork on material that will be folded into a seam or covered by zipper tape. Teams that send only a logo on an empty artboard leave placement around straps and reflective trim to guesswork. Both documents can be useful in a custom program, but they are not interchangeable. A vector file is most helpful when those layers are kept separate and clearly labeled, so the design is judged on the surface the rider and the street will actually see.
How a Fabric Motorcycle Box Breaks Into Panels
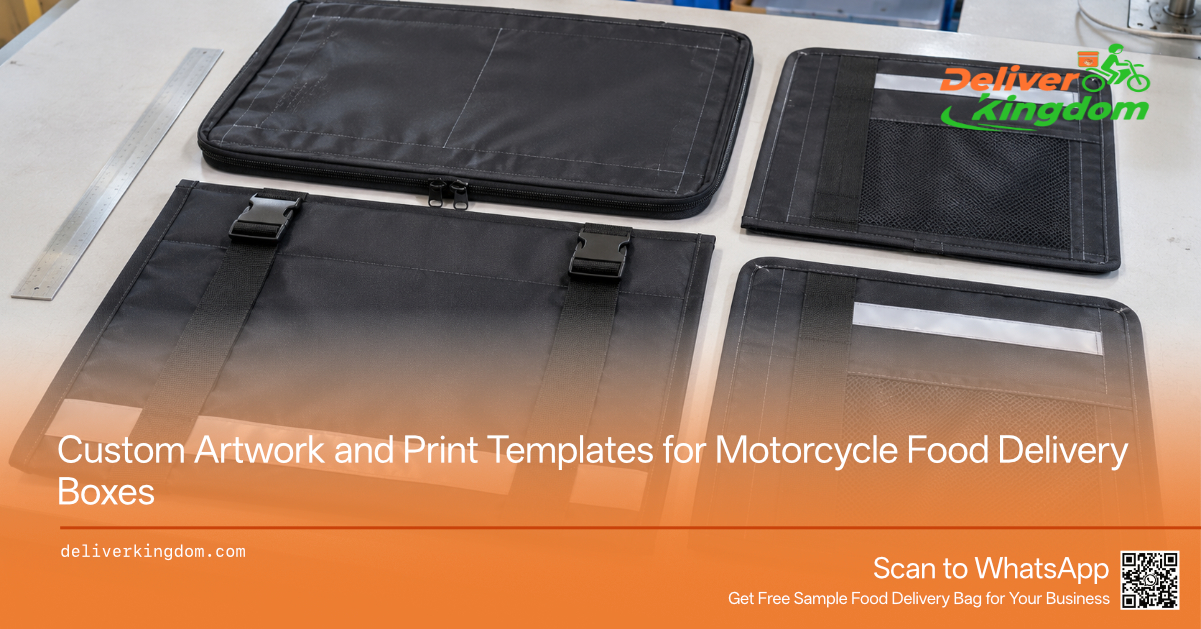
A sewn, rear-mounted food box is a set of outer panels built around an insulated cavity and, on many models, a board or internal frame that keeps the body rectangular on the rack. The usual faces are a top lid, a rear panel facing following traffic, a front panel facing the rider, left and right sides, and a base that sits on or against the tail rack. Those faces are not equal for branding. The lid and the rear panel do most of the work in traffic; the sides are visible when the scooter turns or waits at a light; the front is often partly hidden by the rider’s back and any back pad; the base is a poor print face because straps, abrasion, and the rack occupy it. A hard molded or metal advertising cabinet is a different artwork problem: there is no fabric cutting pattern, and graphics are usually applied to rigid sides. A brief that asks for flat cutting and sewing patterns is describing a fabric or coated-textile shell, whose outer panels are cut and then stitched together. Settling that construction first—rear-mounted textile box versus hard cabinet—keeps the artwork from being planned as a wrap-around decal on a surface that will actually be sewn from separate pieces.
Zippers, Straps, Buckles, and Reflective Strips on the Printable Face
Printable area is what remains after the hardware is in place, not the full size of a cut panel. A top-opening box usually carries a zipper around the lid, often with a flap or overlapping lip that covers the zipper in rain. That zipper line and flap take a margin on both the lid and the upper walls, and a graphic that sits too close will be interrupted when the lid is opened or the flap is closed. Mounting straps, buckles, and D-rings lock the box to the tail rack. Some straps stay on the base; others wrap the sides or come up the front, and they can shift slightly under load, so a mark placed on a strap path will be covered in use. Sewn or clip-on carry handles on the sides do the same at the lift points. Reflective strips or lid trim are there to be seen at night; covering them with ink or film reduces that visibility and can leave a stiff printed edge on a flexible trim. A useful template therefore draws these parts in place—zipper, flap, strap routes, buckles, handles, and reflective trim—as objects the artwork must clear, rather than as decoration added after the logo has already been sized to the panel.
Maximum Print Area, Safe Margins, and Bleed
On a full-scale template, dimensions should be given in millimeters, measured from the finished stitch line, not from the raw cut edge. The maximum print area is the largest rectangle or contour that still clears the zipper, seam, reflective trim, and any strap or handle that will sit on that face. A safe margin sits inside that maximum, so a slight shift in sewing or in print registration does not send ink onto zipper tape or a reflective strip. There is no single margin that fits every model: a narrow lid with reflective trim and a zipper close to the edge leaves less room than a tall, relatively clean side panel. When a program wants a color or graphic to run to a sewn edge, bleed belongs only where extra ink can disappear into a seam or under an overlap. Bleed cannot run across a zipper, a sewn-on reflective, or a buckle landing. Soft lids and walls also flex in use, so an edge-to-edge image that looks sharp on a flat proof can wrinkle or open a thin unprinted line at a corner once the box is packed and closed. The template should show these limits on the lid and on each printable side, rather than offering one overall print size for the whole box.
Printing Methods and the Outer Shell
The outer material decides which printing methods are realistic. A heavy woven polyester, such as a high-denier Oxford-type shell, has texture and often a darker, more matte face; screen printing can lay down opaque, solid logos in a limited number of colors, and fine type or photo gradients are harder to keep clean on that weave. A smoother coated face, such as a PVC or tarpaulin panel, can accept a wider range of solid or full-color work, including some direct printing on the coating, but adhesion and flexibility depend on that coating, not on the name of the method. Heat-transfer or film graphics can carry more detail and more colors on a short run, and they can lift or crack where the panel flexes, where a strap rubs, or where sun and rain work the edges. Color count is a property of the method and the ink or film system, not a fixed number of colors per panel that applies to every box. The brief should name the intended outer material and the kind of graphic—one-color mark, a few solid brand colors, or a full-color image—so available methods can be confirmed for that shell, rather than selecting a method the surface will not hold.
Matching Brand Color on the Fabric and on the Logo
A brand-color or Pantone target is two different jobs on a delivery box. Matching the shell means dyeing or coating the fabric so the unprinted body reads as the brand color; matching the logo means mixing ink or selecting a film so the printed mark hits the same target on that already-colored, often textured surface. A dark, coarse weave will not show a color the way a coated paper chip or a smooth PVC face will, and street light is less controlled than a studio lamp. Asking for a match on both the fabric and the logo is a reasonable direction, and it should be checked on the actual material, not only against a digital swatch. Shell color can also shift slightly from lot to lot, especially on dyed woven goods; programs that need a tight match across reorders should approve a material standard and a printed strike-off rather than describing the color only by a code in an email. A printed logo can be brought close to a brand color on a smooth, light, or evenly coated panel more readily than on a dark textured weave, where the ground color shows through or changes the hue. The sample, not the artwork file, is where that closeness is judged.
What Belongs in a 1:1 Vector File
An Adobe Illustrator file or a vector PDF is useful when it is built at 1:1 scale, in millimeters, with one artboard or a clearly labeled tile for each panel. Separate layers should hold the cut line, the stitch line, the hardware—zippers, flaps, strap routes, buckles, handles, and reflective trim—as non-print objects, plus the safe area, the bleed where it applies, and the artwork itself. Fonts should be outlined, and any raster image should be high enough in resolution to be printed at the size it will appear on the lid or side, not a small web logo stretched across a panel. A single logo centered on a letter-size board leaves those measurements to guesswork. If a factory template is not yet available, the first request can be a print template of the chosen box, with hardware drawn in place, onto which the design team places artwork. A full cutting pattern can be added when the program also needs to see seam allowance and sewing notches. Sending both a flattened preview and the editable vector file lets a reviewer see the design and still correct placement without redrawing it.
What a Printed Sample Actually Checks
A printed sample answers questions a drawing cannot: whether the ink or film sits cleanly on the real outer material, whether the mark clears the zipper and reflective trim once the lid is sewn, whether a large graphic breaks awkwardly at a corner, and whether a mounting strap or handle covers part of the brand face when the box is on a rack. A flat printed swatch or a paper proof is useful for color direction and is not enough to judge those three-dimensional clashes. A complete sewn box takes more material and more making than a single printed panel, so some programs approve color on a panel first and then confirm placement on a finished sample; others need the complete box immediately because the lid hardware is the main risk. Cost and timing depend on the print method, the number of colors or films, whether a new panel pattern is required, and whether the sample is a panel or a finished box. Those commercial terms are confirmed for the specific program, rather than taken from a generic lead-time table. The sample brief should say which faces are printed and how the box will be mounted, so the sample can be packed and strapped the way it will be used.
What Commercial Buyers Should Send DeliverKingdom
A custom print program moves faster when the brief describes the box in use, not only a request for a file. DeliverKingdom supports OEM and ODM programs for insulated food bags, rider delivery equipment, and related commercial transport bags from the Guangzhou and Yangchun manufacturing base noted above, including motorcycle food delivery boxes built as rear-mounted textile carriers. Useful inputs include confirmation that the unit is a sewn fabric or coated-textile box rather than a hard advertising cabinet; which faces should carry artwork, usually the lid, the rear panel, and the sides; the intended outer material; whether reflective trim, mounting straps, buckles, and handles must stay clear of the print; vector artwork, with fonts outlined; and whether the first need is a print template, a cutting and sewing pattern, or both. It also helps to say whether the printed sample should be a single panel for color or a complete box for placement. With those notes, DeliverKingdom can mark print areas and hardware on a 1:1 template, advise on methods that suit the shell, and produce a sample on the actual material. Commercial teams ready for that step can contact DeliverKingdom through deliverkingdom.com with the usage brief and artwork.
Q: What is the difference between a cutting and sewing pattern and a print template?
A: A cutting and sewing pattern shows each outer panel at cut size, including seam allowance, zipper tape, and notches used to sew the box together. A print template shows the finished visible face after sewing, at 1:1 in millimeters, with maximum print area, safe margins, hardware clearances, and bleed only where ink can disappear into a seam. Design work should be placed on the print template, not on the raw cut outline.
Q: Which printing methods work on a motorcycle delivery box, and how many colors can be printed per panel?
A: The method follows the outer material and the graphic. Screen printing suits solid logos in a limited number of colors on a woven polyester shell. Smoother coated faces, such as PVC or tarpaulin, can accept a wider range of solid or full-color work. Transfer or film graphics can carry more detail and may wear at flex points and strap paths. There is no single color count that applies to every panel. Available methods and color limits are confirmed for the actual shell and artwork.
Q: Can the shell fabric and the printed logo both be matched to a Pantone color?
A: They are two separate matches. The shell is dyed or coated; the logo is printed or applied onto that finished surface. A smooth, even coating shows a target color more closely than a dark textured weave, and a paper chip will not look the same as the box in street light. A material standard and a printed strike-off on the real outer fabric are the practical way to judge closeness, especially when later reorders must stay consistent.
Q: What should a printed sample include, and how are cost and lead time set?
A: A useful sample is printed on the actual outer material and, when placement is the risk, sewn as a complete box so zipper, reflective trim, and straps can be checked. A flat swatch is only a color check. Cost and timing depend on the print method, the number of colors or films, whether a new pattern is required, and whether the sample is a panel or a finished box. Those terms are confirmed with DeliverKingdom sales for the specific program.
Q: What should buyers send DeliverKingdom to request a print template or a printed sample?
A: Share that the product is a rear-mounted sewn textile box, which faces will be printed, the intended outer material, which hardware must stay clear of the artwork, vector files with outlined fonts, and whether the first deliverable should be a print template, a cutting pattern, or a printed sample of a panel or a complete box. Commercial terms such as quantity and timing are confirmed with DeliverKingdom sales for the program.



 Get a Quote Online